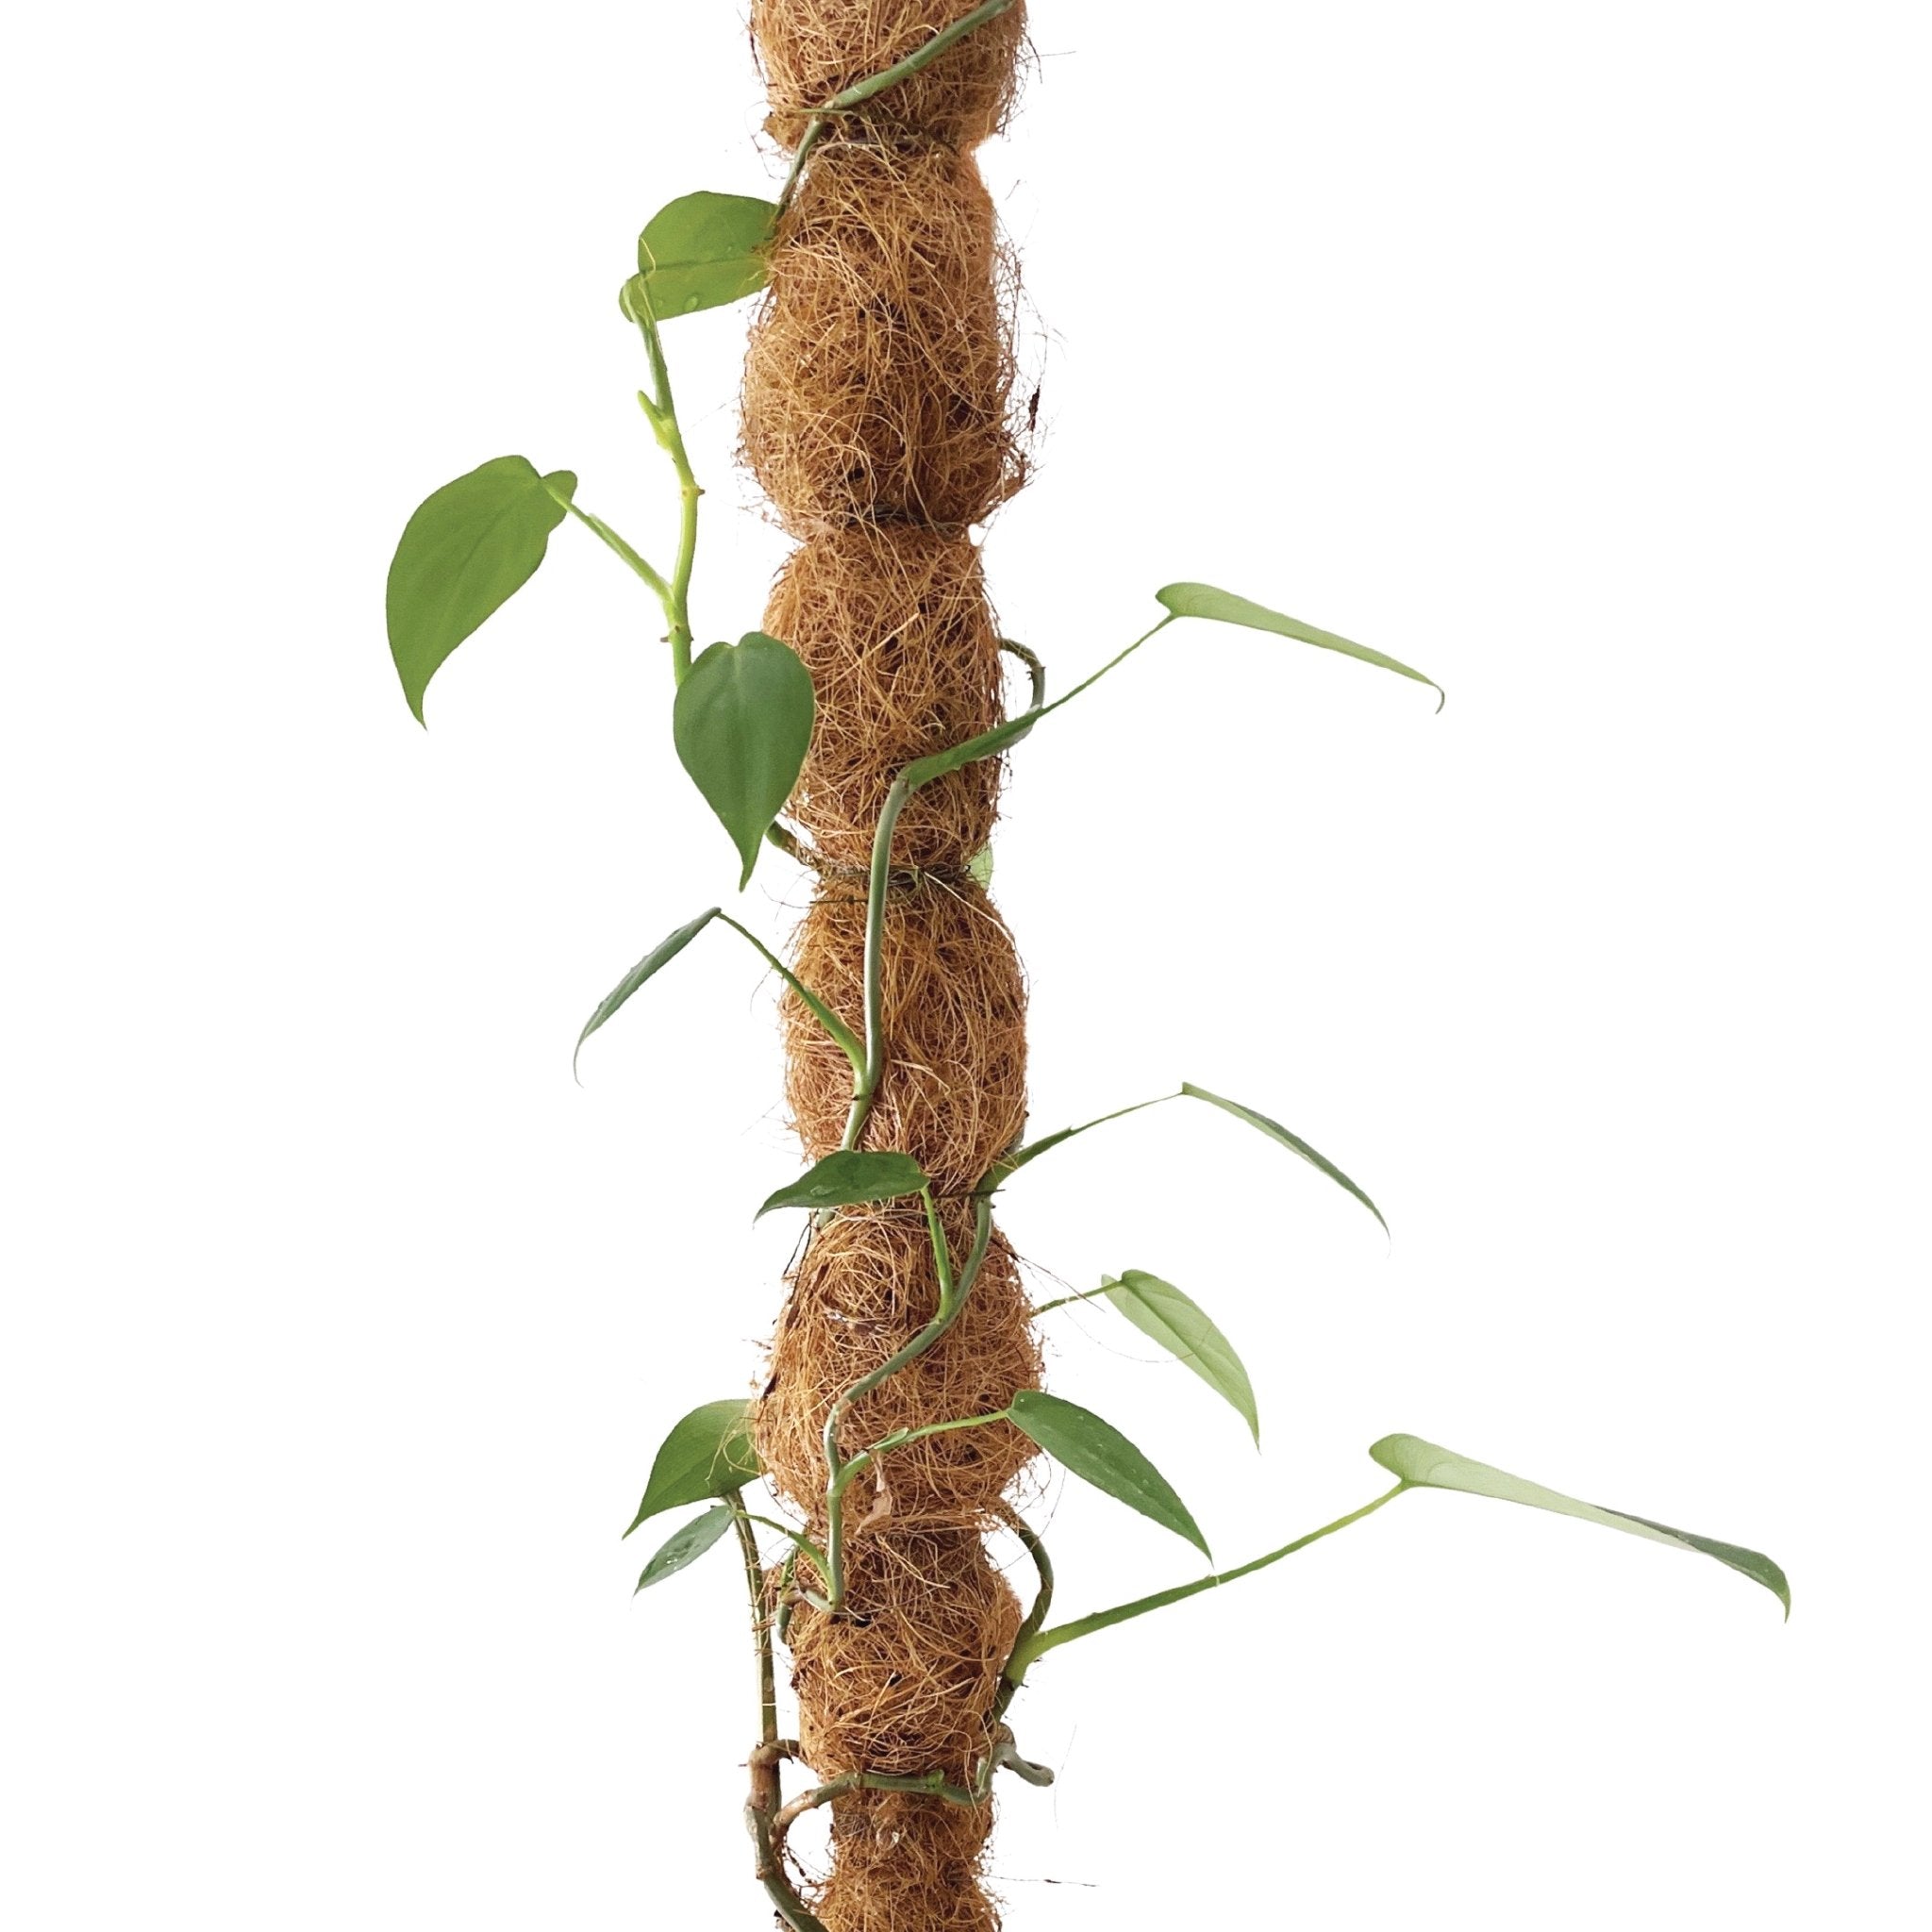
MAKE A SUSHI ROLL MOSS POLE
HOW TO MAKE A MOSS POLE USING THE SUSHI ROLL METHOD Moss poles are a great addition to support your tropical climbing houseplants. The natural habitat of these plants is a tropical rainforest (hot, moist, lush). ...
Rest assured! We only send emails once every 1-2 months with product releases, sales or shop updates.
A step by step guide on how we set up, built, and filled our first raised garden bed in Durham, NC (Planting Zone 7b).
+ the many lessons we learned throughout the process!

| PLACEMENT PREP | 1-4 hours pending conditions |
| BED BUILD | 1-2 hours |
| BED SET UP | 1-2 hours |
| BED FILL | 1 hour |
| PLANNING | 1-3 hours |
| PLANTING | 1 hour |

We chose to build simple DIY wood raised beds instead of planting directly in the ground. Due to our poor Soil quality, excess of weeds and invasive vines, and poor drainage - planting direct in ground was not a good option for us. When we built our first raised bed, we had also just moved into our house and the previous owners did not maintain the yard at all, so our experience might have required a lot more labor than what you will need!
1. SOIL QUALITY - Raised beds allow you to create your own Soil quality which is ideal if your ground soil quality is Poor.
2. SOIL TEMPERATURE - Since your raised bed is above ground, Soil temperatures will stay cooler in the Summer and warmer as temperatures drop.
3. BETTER DRAINAGE - The elevation of the raised bed and less compacted soil will allow water to drain more easily and prevent flooding in your garden.
4. LESS WEEDS - Soil in your raised bed will be less compacted (no one is walking on it). Compacted soil has less air pockets and creates poor drainage. The Soil in your bed will have increased air flow and better drainage, which in turn will allow for healthier plant growth and less weeds. Bonus: if you add cardboard at the bottom of your raised bed, it will act as an additional weed barrier.
5. EASIER ACCESS - the taller the bed, the less you need to bend over to access it!
6. MOVABLE - Although you probably do not want to re-locate your raised bed, if you discover you did not select the right placement or need to move your bed for the next season, you can!
7. EASY TO BUILD - Most raised beds are pretty simple to build since you are typically just making a rectangle :)
8. COST EFFICIENT - building your own raised bed will be more time consuming, but material costs will be at least half of what you would spend on buying a pre-made bed. You also have complete control over what materials to use.
NOTE: it is recommended that the maximum width of your bed is 4 ft. to allow you to access the middle of the bed from either side (essentially within arm's reach.)

2. PREP THE PLACEMENT: We had to spend a lot of time prepping our space for the Raised beds. Our property was overridden with invasive vines and weeds in the ground. This step might be easier for others that do not need to remove all the excess vegetation as we did.
As you can see, the dogs really enjoyed helping with this step :)

3. BUY / GATHER MATERIALS FOR THE BED
LUMBER
Due to lumber shortages and limited availability we ended up using 1"(thickness) x 4" wide x 8 ft. long unfinished CEDAR WOOD. This is not the cheapest wood option especially with pandemic pricing. We wanted to use Cedar as it is naturally water, rot, and pest resistant so the top choice for raised beds. Ideally you would buy 2" thick lumber so that the bed will last longer but it just wasn't available for us. Our back up option was to use PINE WOOD as this is also workable but will not last as long as CEDAR.
It is also important to note, for those that do not purchase lumber often (such as myself) - listed dimensions for lumber are typically slightly smaller than actual measurements. For example:
Listed Size: 2" x 4" x 8 ft.
Actual Size: 1.5" x 3.5" x 8 ft.
You can also use available found materials, I've seen people use logs, concrete blocks etc. You just want to make sure you DO NOT use any TREATED/PAINTED LUMBER or any material that has a coating or finish. If you you are planning to grow anything you plan to eat in your raised bed, I would not recommend risking any finishes/chemicals, etc leaking into your soil that you are growing food.
***There have been studies that contamination from using Treated Lumber for Raised beds is "minimal" but in my personal opinion, I would not risk this.
SCREWS
Screw length needed will depend on the thickness of your wood, We used 1 1/2" and 2 1/2" screws to assemble the majority of the bed. 
4. BUILD THE BED
Because of our limited lumber options, we decided to build 8ft long x 4 ft. wide x 8" deep Raised beds. There are PDFs and many different lay out plans you can find online, but we just built a really basic rectangle and simply added additional vertical wood pieces for support.
1. CUT wood (measurements shown in image above). You can either get these cut in advance at your local hardware store or cut yourself with a saw.
2. LAYOUT wood sides (8 ft and 4 ft for ours) and stack wood for each side piece.
3. ATTACH wood 8" wood supports with screws at center and each side. Add additional supports in between if needed for longer bed sizes.
***On 4ft Side pieces we left 2" space on each side for joining the corner pieces.
4. JOIN side wood pieces at corners and secure with screws.


5. LEVEL THE BED
Ideally, you will place your raised bed on level ground. Unfortunately for us, our yard slopes downwards towards the fence. It's hard to tell in photos, but you can easily notice when you place the bed down and it doesn't sit flat. Once our bed was built, we placed it where we wanted it to be set up and then had to dig and shift dirt to the back side to eliminate the slope. It does not need to be perfect but using a LEVEL does help!

6. FILL THE BED

LAYER 2: CARDBOARD - re-use any old shipping boxes if you can! This layer will help block weed growth and naturally break down as time continues. I do not recommend using landscape fabric or any fabrics as a weed barrier as these are typically made from plastic or synthetic materials. I prefer to avoid using these both for environmental purposes and to avoid growing food that would be contaminated by these materials / toxins.
LAYER 3: OLD LEAVES / TWIGS - gather from your yard if possible! These will naturally break down over time and add nutrients to your Soil.
LAYER 4: ORGANIC COMPOST - use your own or buy in bulk / bags at your local hardware store. For our first bed we purchased about 8 bags of Organic Mushroom Compost since our own compost was not ready yet. For our 2nd and 3rd raised beds we were able to use our own home compost which is significantly cheaper if you can do this.
LAYER 5: ORGANIC TOP SOIL - buy in bulk if possible or purchase bags at local hardware store. We used about 12 bags of Organic Top Soil. For future beds, we ended up adding more compost, manure and other materials so that we needed less Top Soil (6-8 bags).
***It is also best to fill the bed all the way to the top edge, or even have it go higher as the Soil and materials will settle and sink down over time.
LAYER 6: (OPTIONAL) NATURAL FERTILIZER - add earth worm castings, manure, or other amendments to add nutrients to your beds.
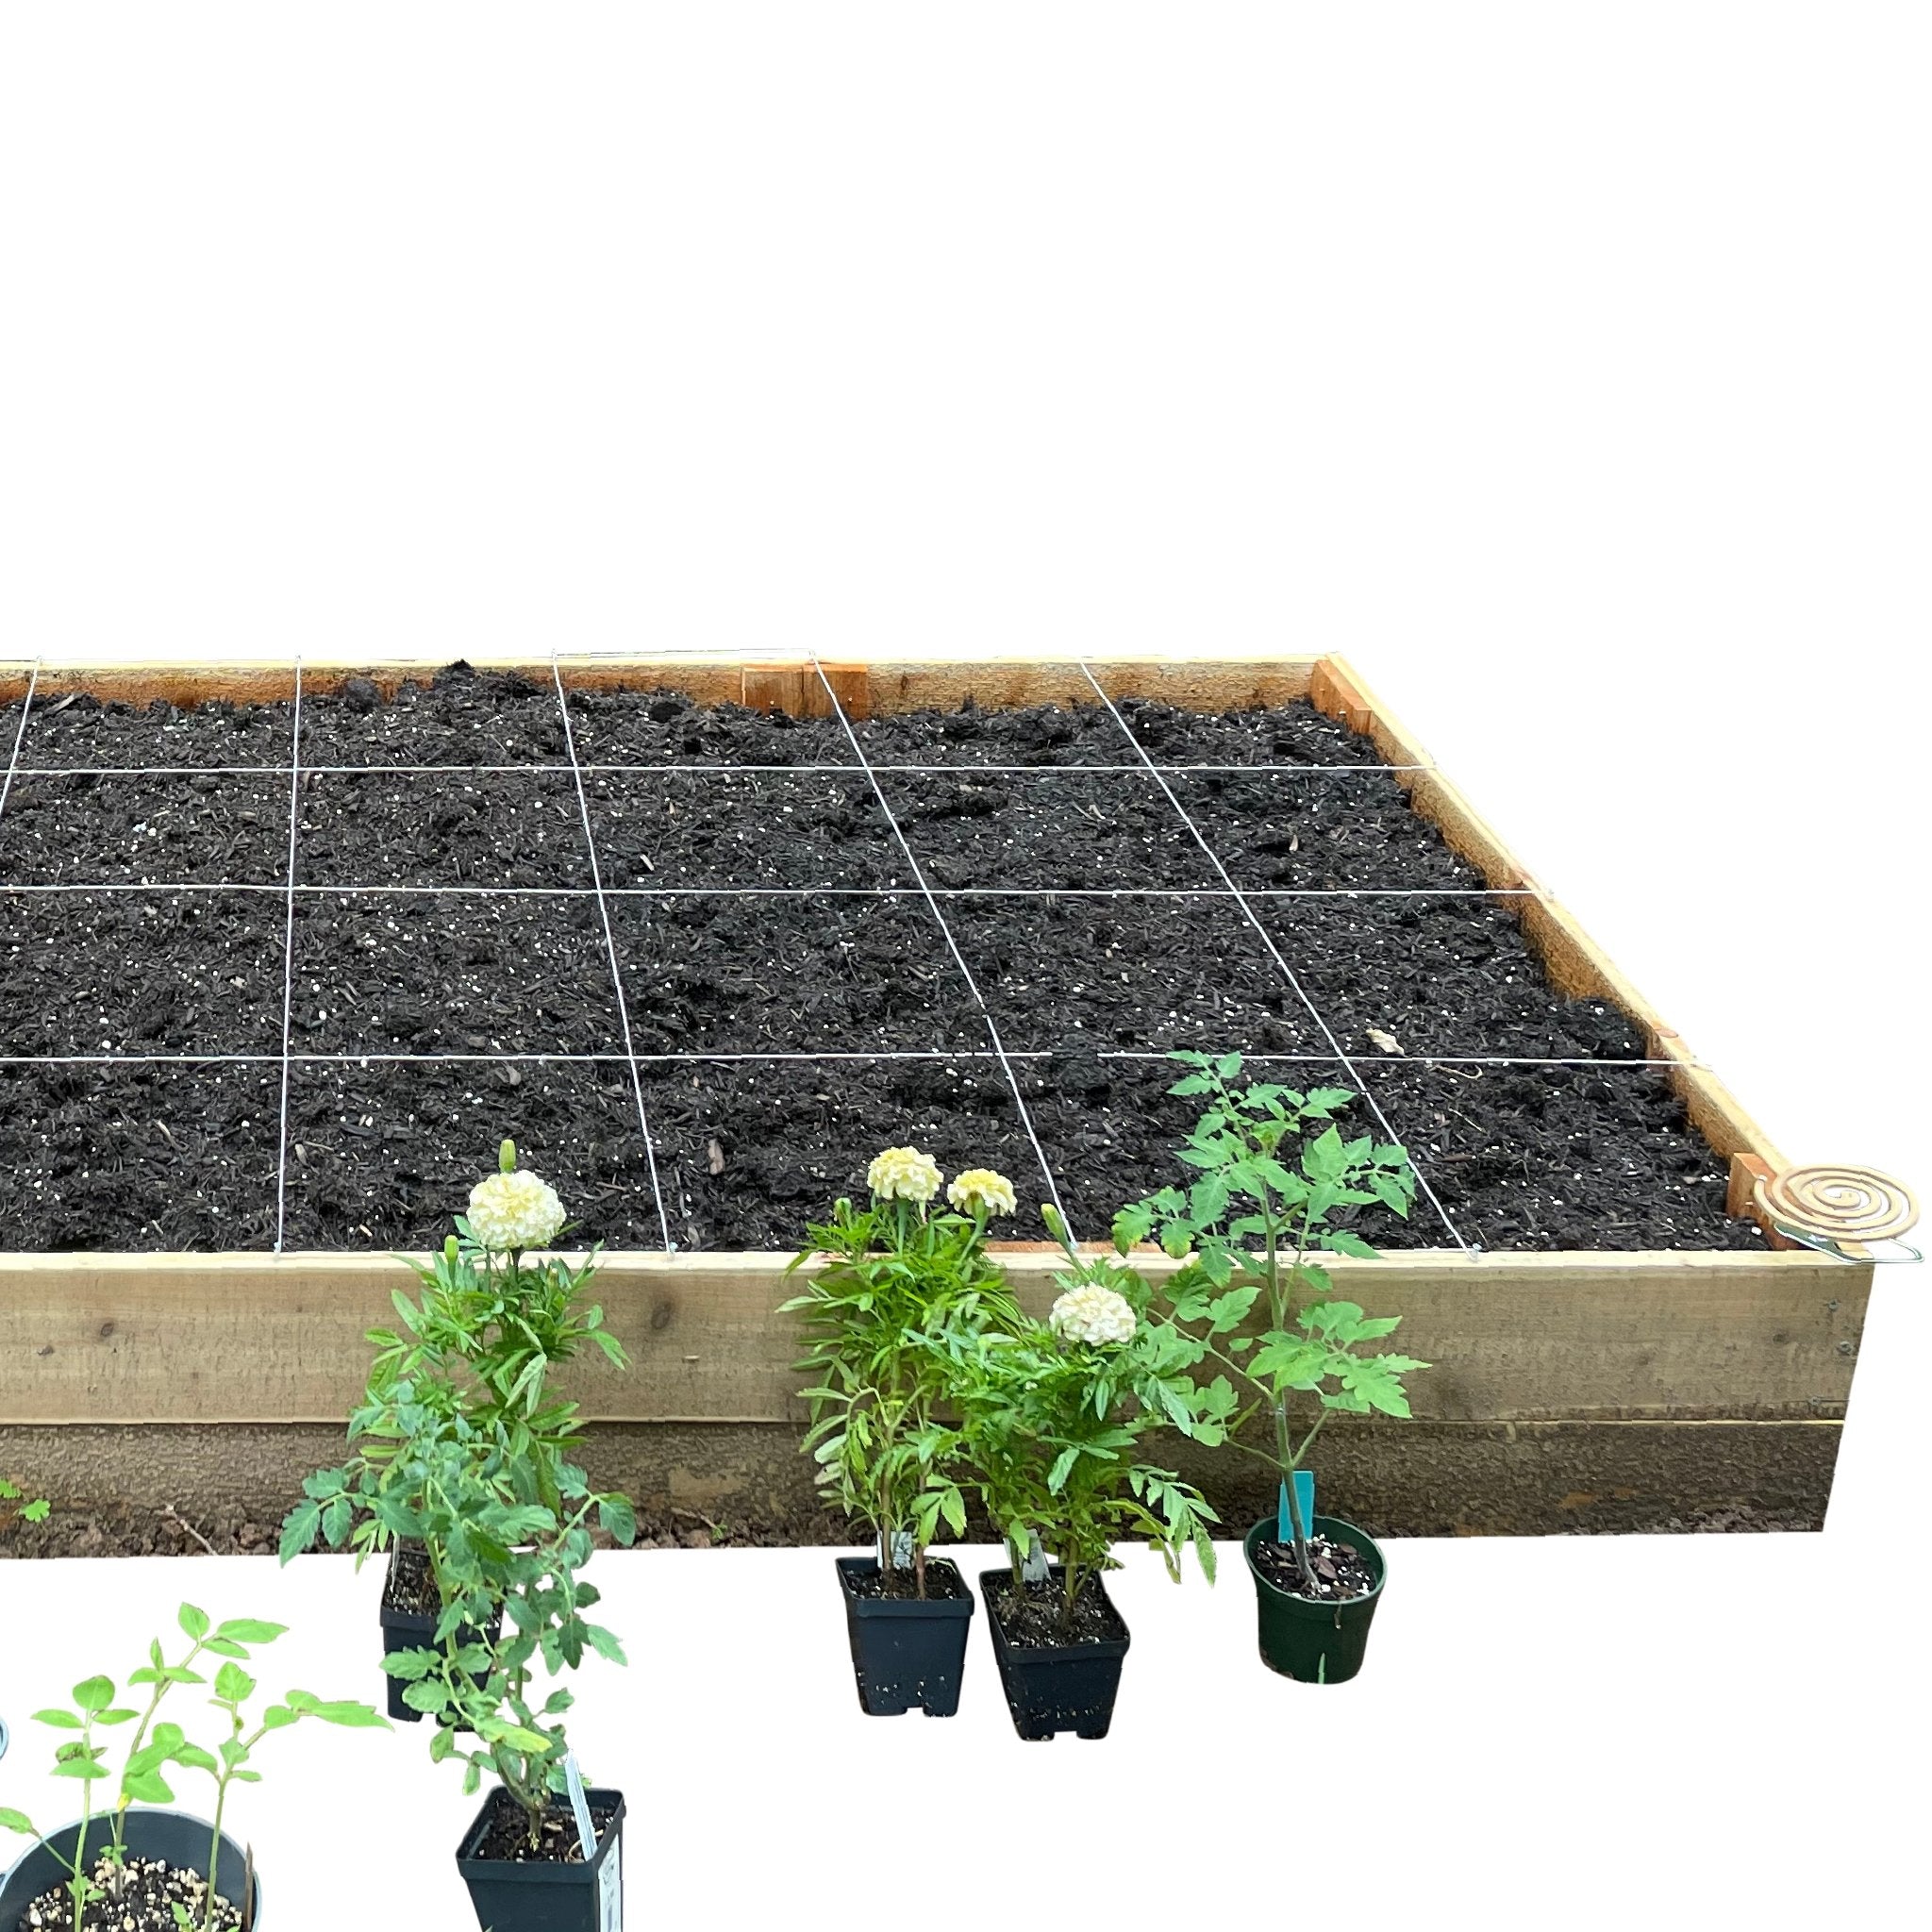
7. SET UP FOR SQUARE FOOT GARDENING (OPTIONAL)
 I enjoy square foot gardening because it makes it really easy to plan your Raised bed garden. Pending your raised bed size - you just need to create a grid with 12" x 12" squares. We used our WAX PENCIL and RULER to make the placement for our 3/4" FLAT HEAD SCREWS top edges of the bed. After you mark the placements then you can add your SCREWS but only screw in about halfway down so there is space between the screw head and the wood. Next you use your COTTON TWINE to make the grid. Start at one end and wrap the twine several times around the screw and then bring directly across to the other side. You can either tie off one by one or use 1 connected twine in total to make the entire grid. Since our bed is 8ft x 4 ft we had 8 squares in the length and 4 squares in the width.
8. PLAN PLANT PLACEMENT IN BED

For our first raised bed, I tried to focus on growing plants that we like to eat the and that also can be costly to buy at the grocery store. We like to eat a lot of fresh tomatoes, bell peppers, cucumbers, herbs, edible flowers, and squash (not very expensive but wanted to try growing them).
Pending your location, it is important to check when is the right time to plant outdoors, this is a great resource that will use your zip code to create a vegetable planting guide:
I did a lot of research on companion planting, here is a great resource for reference:
It's also important to know what plants should NOT be planted near each other.
Once I had a good idea of what I wanted to grow, I drew out a grid with 4 x 8 squares. I used these Square Foot Planting Charts to determine how many of each plant to place in each square.
Honestly, this part of the process can feel very overwhelming so I'm glad that we just started with one bed and limited what we wanted to grow.
Here is my square foot layout plan for our first raised bed:

It's important to take plant height into consideration, as you don't want to plant Tomatoes in the front of your bed and have them shade everything that is planted behind them.
9. PLANT SEEDLINGS OR SEEDS IN BED!
I ended up buying a bunch of established seedlings from our local nurseries and hardware stores to plant in our raised bed. Since we had just moved earlier in the year, I started most of my seeds a bit too late. But, I did have a few of my own seedlings and some radishes and beet seeds I planted directly in the bed.

Here is the final bed after planting. I had added Squash, Zuchinni and Cucumber to the back row after and only got 1 blurry photo (on right).

We have added 2 additional raised beds since our first and made a few improvements along the way. I have also switched to primarily growing all plants from seed, which is significantly more affordable than buying seedlings. I will share an update on all of our beds and progress soon!
Always ensure that your raised beds are receiving enough full sun throughout the day. We realized after planting our first bed, that one of the nearby trees was severely shading our bed during peak sun hours. We ended up cutting down the tree and noticed everything grew much faster with the additional sun! ***We have so many trees so this wasn't a huge issue for us.
For watering, we started out just watering our Raised bed with our hose. You might want to invest in setting up an irrigation system to make watering easier and more efficient, especially if you have multiple beds.
We also periodically add a layer of our own compost, earthworm castings, or manure as the Soil settles down and to help provide additional nutrients to our vegetables as they are growing.
Step by step video guide is also available on our YouTube
Please leave any questions or comments below!
0 comments