MAKE AN IKEBANA ARRANGEMENT - USING FOUND GREENERY!

SIMPLE IKEBANA TECHNIQUE USING GREENERY FOUND IN OUR BACKYARD
A step by step guide on using the "Sailboat" method for creating your own ikebana arrangement for FREE!
No need to buy expensive flowers (although you still can do this if you prefer). Utilize plants and greenery found around your home or on a nature walk to make your own ikebana inspired arrangement.

FEATURING RT1home Kenzan:
Time
Gathering plants / greenery: 10 - 45 min (longer if you gather on a hike!)
Assembly: 5-10 min
Materials
- PLANTS / FLOWERS - any greenery you have available with sturdy stems
- KENZAN - We are using our Size Small ROUND KENZAN
- SCISSORS - To cut stems or trim plants. We are using our TRIMMING SCISSORS
- GLASS / TRAY / SHALLOW BOWL - to display your arrangement in. We are using both a drinking glass as Option 1 and our Size Small PORCELAIN TRAY as Option 2. Also available as SETS:
- FLORAL SET - includes 1 short 11oz glass + 1 small kenzan
- KENZEN TRAY SET - includes 1 small kenzan + 1 small porcelain tray
- DEEP BOWL - to hold water for plants to stay hydrated and to cut stems
- WATER - to cut stems in and to hydrate your completed arrangement

Background
Ikebana is the art of Japanese floral arrangement.
I learned this simple "Sailboat" technique from my friend and former employee Nozomi Morita when we had our studio / shop based in Los Angeles. Nozomi was born & raised in Osaka, Japan, she was taught ikebana from her mother who is certified in ikebana in Japan.
Instructions
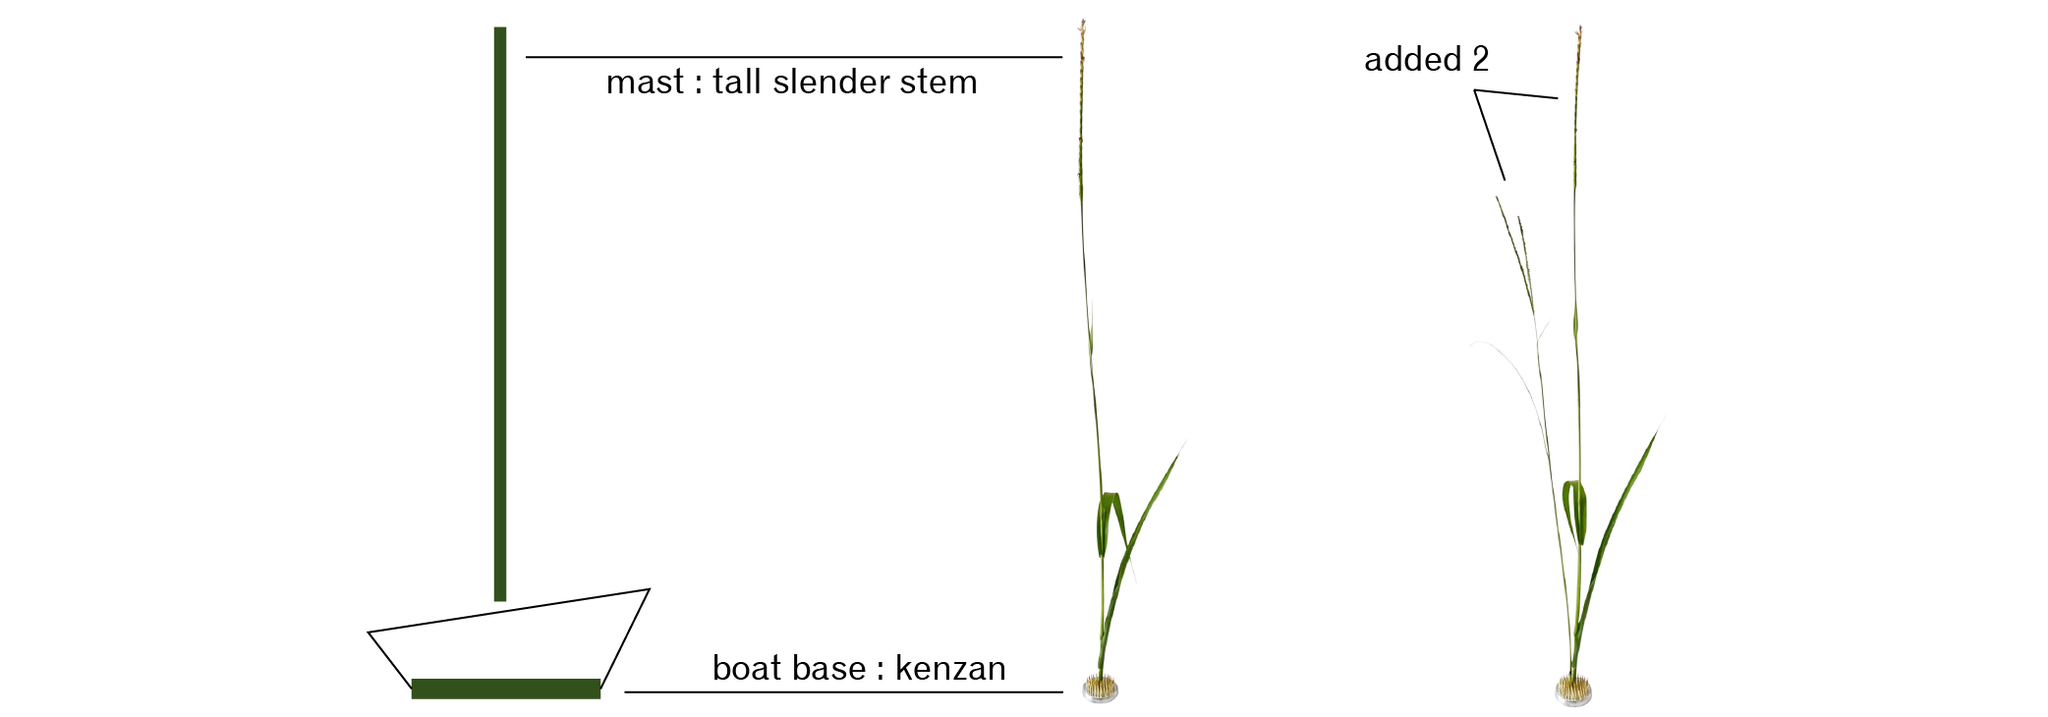
1. PLAN BEFORE YOU GATHER:We are going to use the "Sailboat method" as a very rough guideline for making an ikebana arrangement. So with that in mind - I want to make sure that I gather some very tall and slender stems for the mast, something short and full for the front of the boat, and a few options that are taller / full in shape for the Sails.

2. GATHER GREENERY:
I gathered a variety of plants, most of which I do not know the identity and may even be weeds. One of my favorite selections is actually the blooms from our English Ivy, which I did not even realize it flowered and they are pretty!

3. ORGANIZE YOUR GREENERY
Place all the greenery you gathered in your DEEP BOWL of WATER to ensure they stay well hydrated. Sort out which pieces your would like to use for each section of the "Sailboat." For example - the tallest stems will be used for the "mast"

4. CUT OR TRIM ANY STEMS IN WATER
Once you've narrowed down the stems you would like to use for your arrangement, trim and adjust heights as needed. When cutting, it is best to cut INSIDE the bowl with water to increase the plant's "vase" life.
NOTE: Why you should always cut stems underwater:
When the stem is cut in air, the plant immediately loses access to water. As air flows through the stem, an air pocket is created and prevents the absorption of water.
*** Please remember to dry your scissors after getting wet to prevent rust! ***

5. ARRANGE GREENERY ON KENZAN
Going with the Sailboat method as a rough guideline for our arrangement.
5a. I am starting with the tallest stem(s) for the MAST at the center of the BOAT BASE (kenzan)

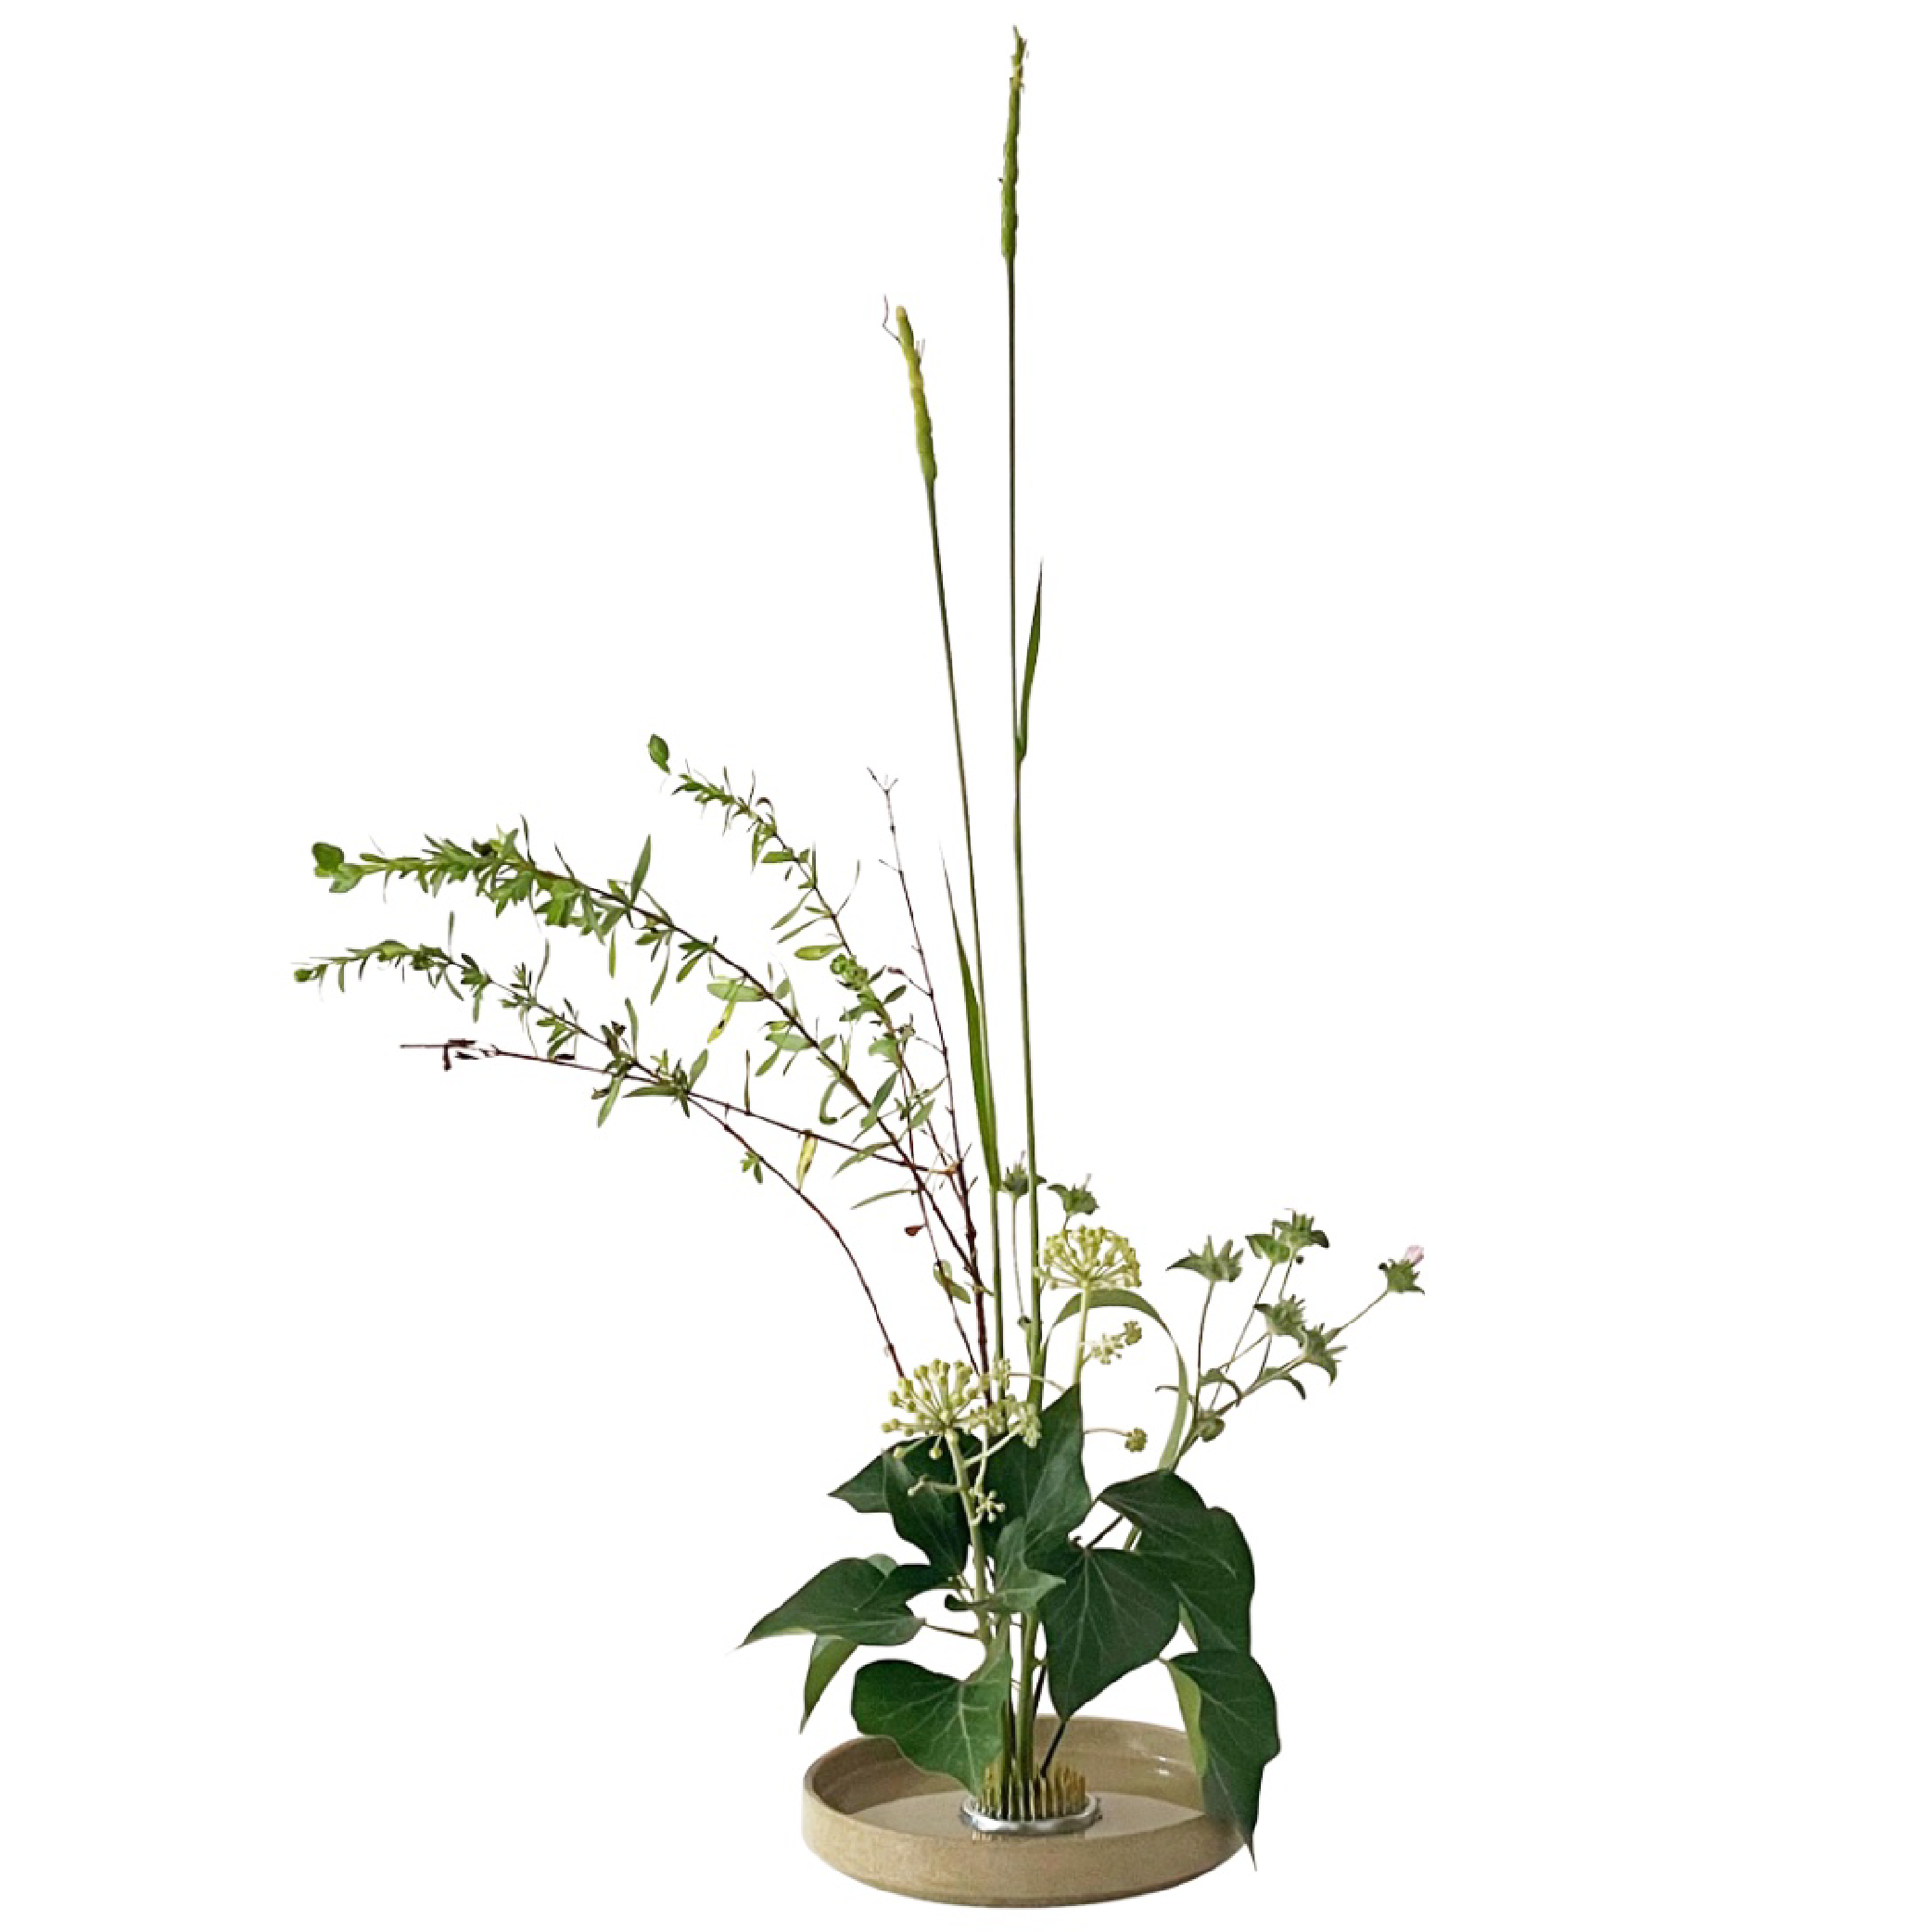
5b. Next I'm adding the English Ivy Blooms to the front of the boat (BOW) - as this is going to be the main feature so I want it to be front and center.

5c. Now I will add an unidentified plant the left Sail or MAIN SAIL - this should be a taller and most full stem.

5d. For the final Right Sail or JIB, I am adding the flowering stems that are slightly shorter than the left Sail, but still have some fullness.

5e. For the BOAT, you can use any vessel of choice - we are using a short drinking glass for this example.

6. ADJUST / FINESSE / TRIM AS NEEDED

7. PLACE IN YOUR DISPLAY CONTAINER OF CHOICE
OPTION 1: Short Drinking Glass - make sure to fill water level to above the top of the kenzan so that the stems are able to absorb the water.

OPTION 2: Porcelain Tray - same as above

Further Steps
Always ensure that the water level remains above the top of the Kenzan!
To extend the life of your plants / flowers, it is best to trim stems (underwater) and change out the water daily if you can.

Step by step video guide is also available on our YouTube
Please leave any questions or comments below!
- Tags: DIY
0 comments


